Introduction
Hacktoberfest is approaching, and it's one of the most difficult periods for code maintainers. Thousands of Hacktoberfest participants submitted 294,451 approved pull/merge requests in support of open source projects last year, using a variety of coding languages. As a result, merging your PRs takes longer for projects with large code bases. Although we hoped to integrate our code faster, the maintainers needed to be worried about safety and scalability. Mergify provides a solution to automate their GitHub process for individuals who are tired of spending hours typing git commands and navigating the GitHub user interface.
Instead of wasting time monitoring pull requests, Mergify would free up time that could be used for development and other crucial tasks. Because the PR won't be merged until the CI is complete, one of the things I'm so bored of doing is going back to the PR to manually click on the merge button for the PR that you authorized. Find out more about Mergify's advantages by visiting the official website.
Getting Started
Given your familiarity with mergify, let's proceed and set it up for use with our current repository. First, be sure you register on this website, mergify.com. The dashboard below will appear once you have logged in.
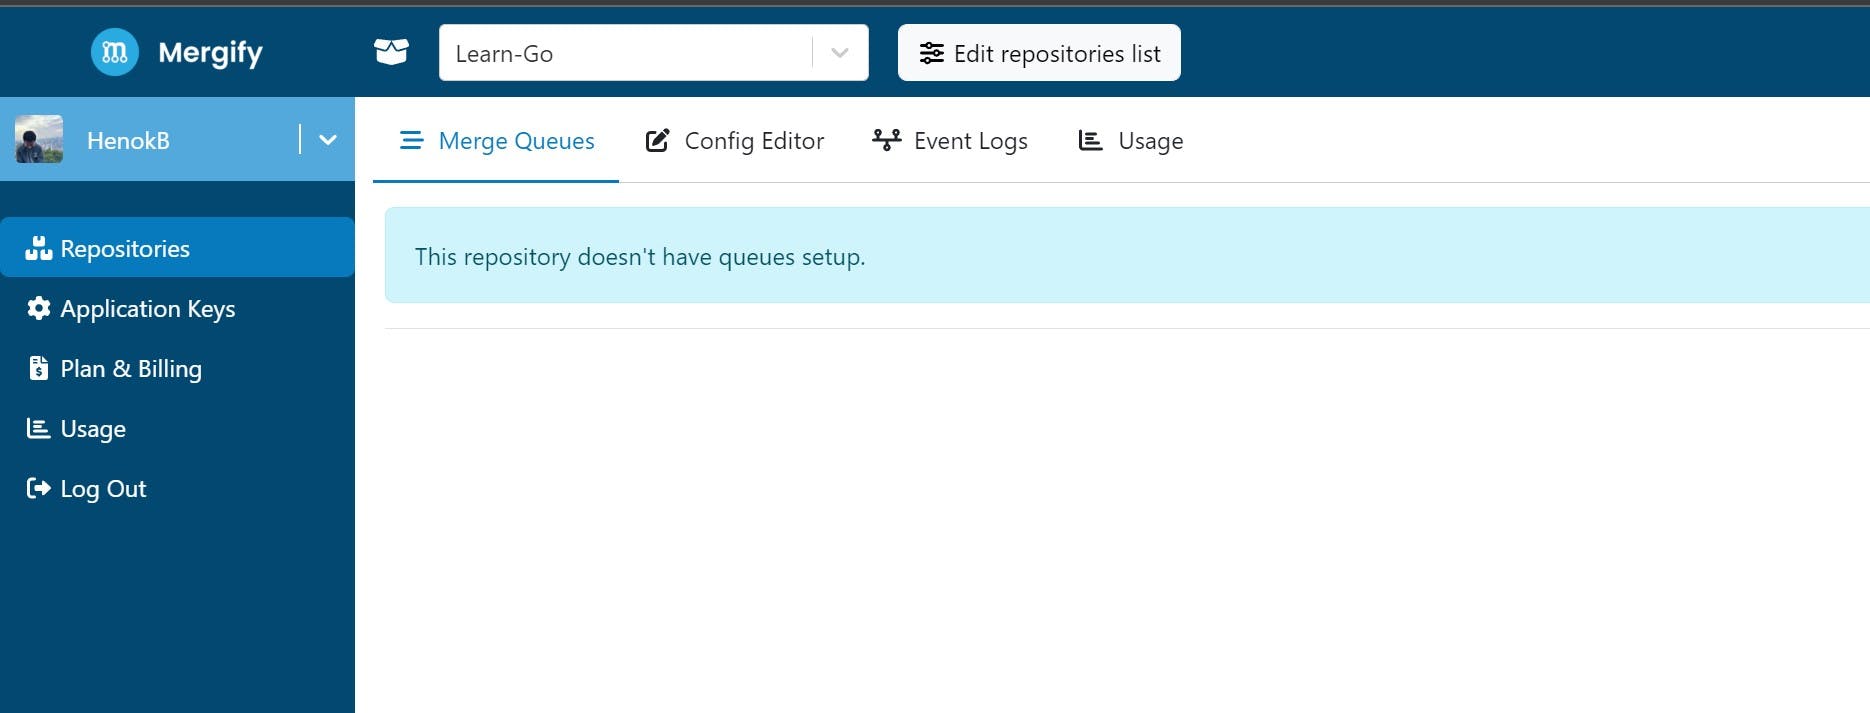
At the top, you can see the names of your repos and you can choose the one you want to add mergify. Once you choose your repo the next step is to go to the config editor.
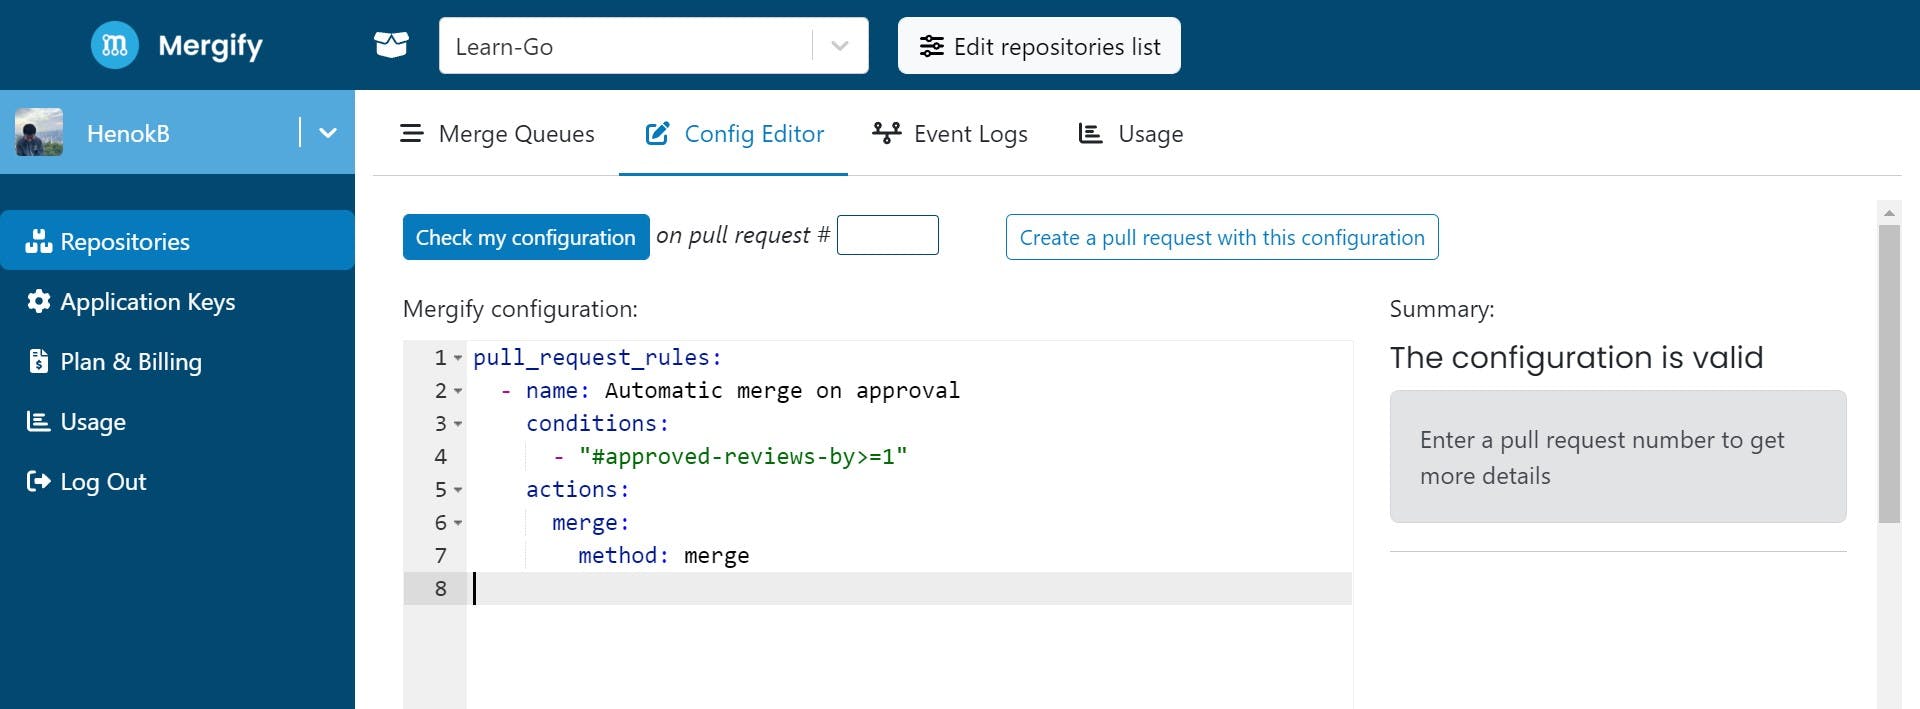
The config editor is your place to put the rules to your pull requests. As you can above, I have one rule and that is pull_request_rules which can contain a list of rules. The next one is the condition, a place for you to put a list of conditions that a PR must match to execute the configured actions. Currently, I've one condition and that is conditions: - "#approved-reviews-by>=1". This means that at least one member (#1, you can make it any number if you want) has to approve it to run the execute the configured actions. Our action, in this case, is to merge the PR.
The next step is to include a YAML file in your project now that you should have a conceptual idea of how the configuration editor appears. The configuration file should be generated in the repository's root directory and given the names .mergify.yml, .mergify/config.yml, or .github/mergify.yml. This is both strongly advised and expected. I'm going to save it in my root directory with the name .mergify.yml.
After adding the configuration file, mergify is now used by your repository. It will carry out the actions, which in this example is to merge when someone attempts to create a PR. When they try to create a PR, this is what other people will see.

As you can see mergify has been executed, so let's check this PR and approve it.
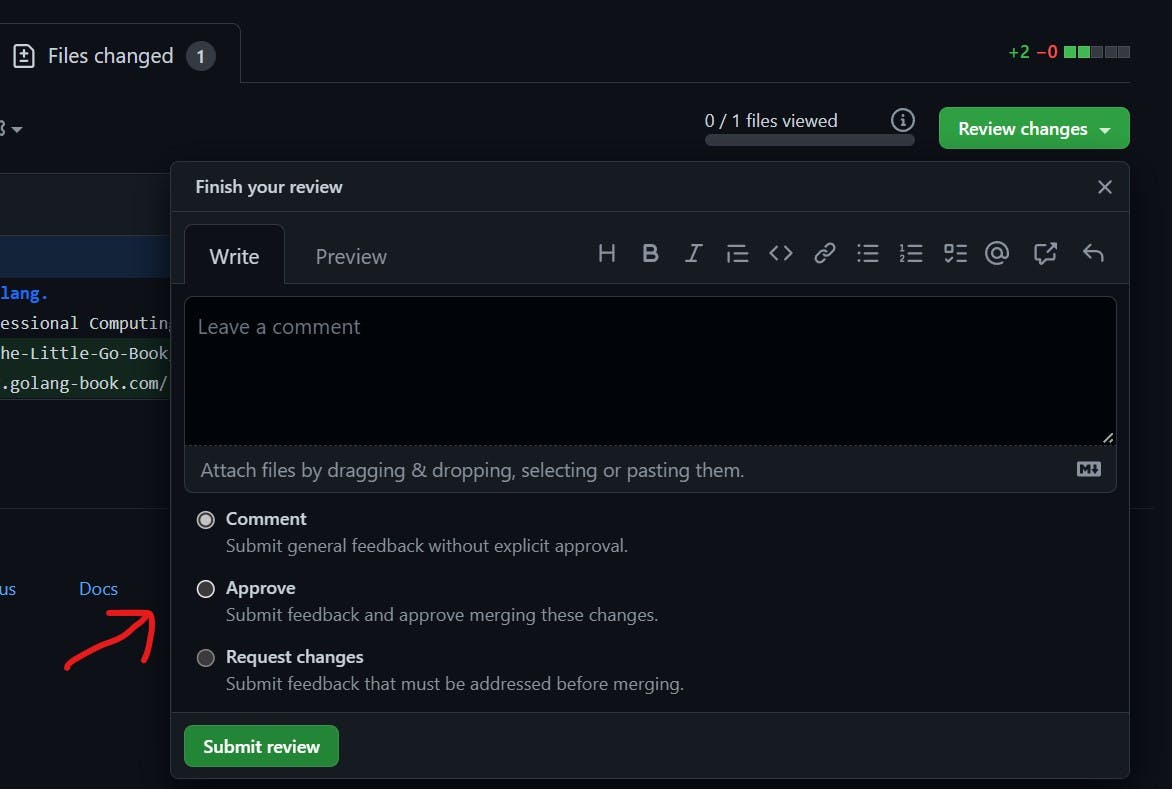
When you do so you will see this and that mergify has merged the approved PR.

You can always go back to the Config Editor in the dashboard and check different things. Below you can check the status of different PRs by just entering their number. As you can see, I wanted to check the first PR and who approved it.
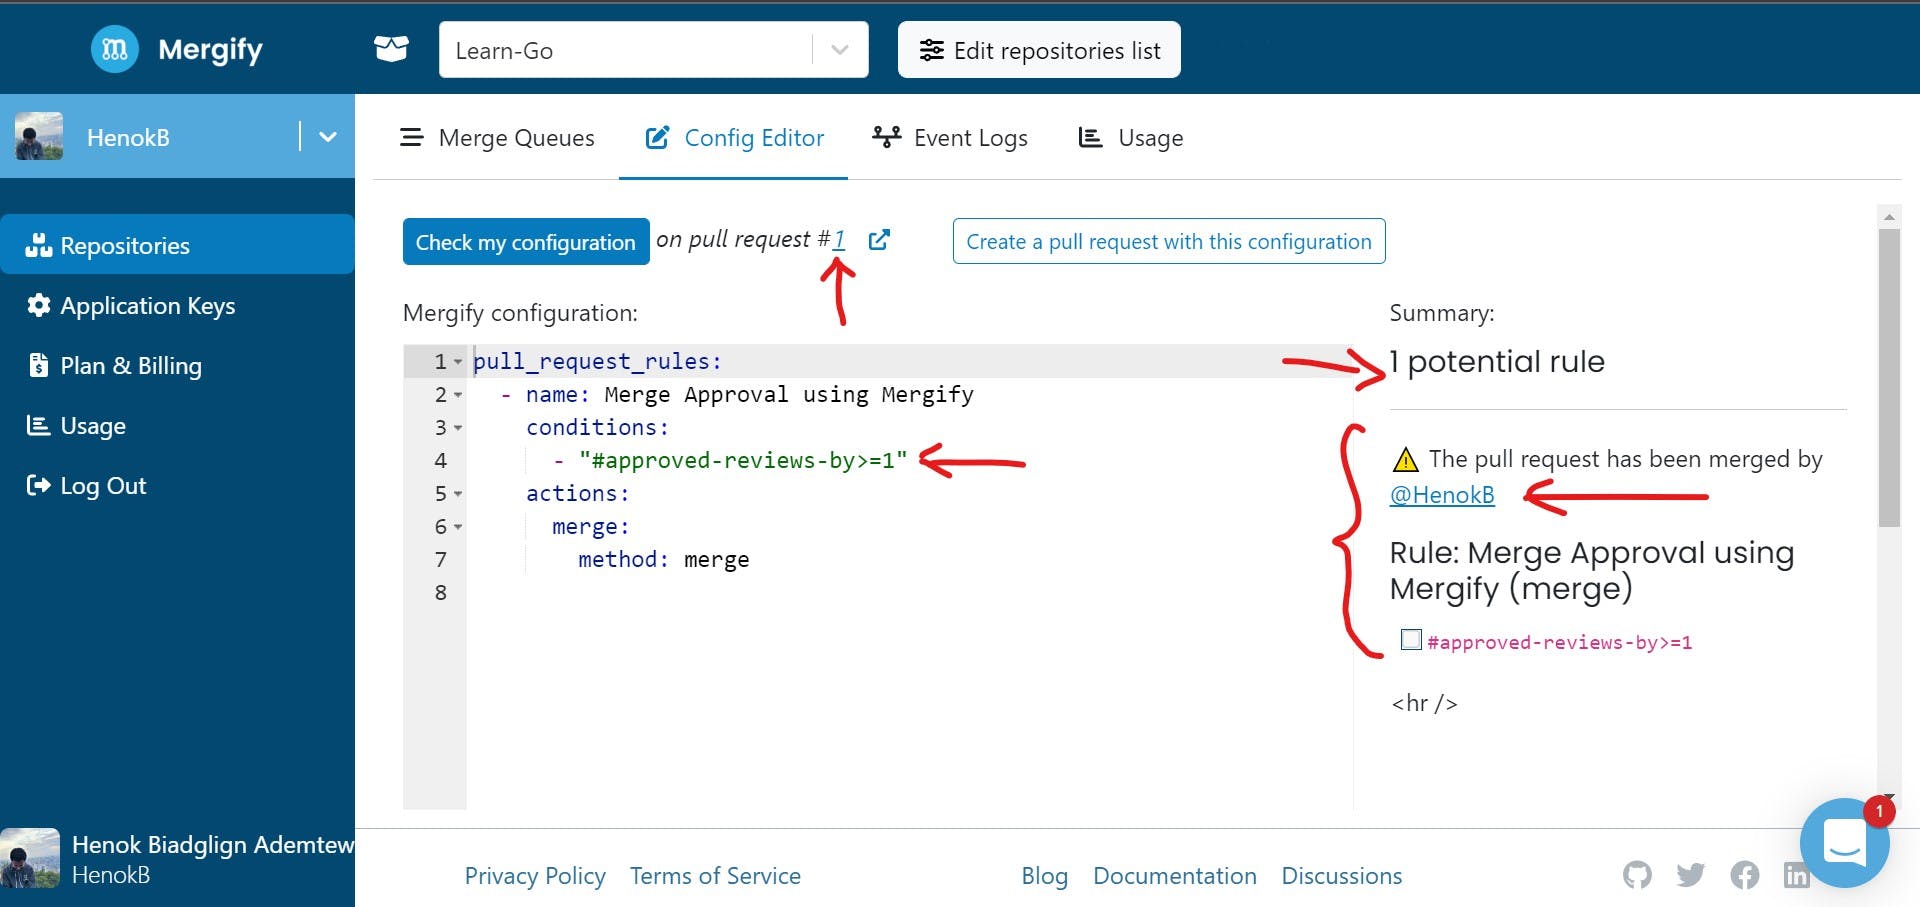
🎉🎉🎉You are done, congrats you can now go ahead and celebrate. Let's say you are managing thousands of PRs, maintainers, and contributors, mergify will help you assign people, rebase, delete, close, comment, delete_head_branch, dismiss_reviews, edit, label, and many more. For example here is a simple way you can assign people for review based on some guidelines.
pull_request_rules:
  - name: assign PRs with Python files modified to jd
    conditions:
      - files~=\.py$
      - -closed
    actions:
      assign:
        add_users:
          - jd
Make sure to give the repo a star ⭐️ and If you want to contribute to my repo Learn Go you can go to this GitHub Repo and make a PR. To learn more about Mergify you can go to the official website. If you have any questions, I'd be pleased to answer them and assist you in getting started.
